What is a website sitemap?
Well, that depends on who’s asking.
For search engines, sitemaps have to do with the XML and HTML codes that enable site crawling. For UX and web designers, a sitemap is about the interconnection between the various pages of a site.
While the former is strictly called a sitemap, the latter is sometimes called a visual sitemap. This difference stems from what each term means to various sections of the internet world.
Typically, a visual sitemap is used as a planning tool by designers to organize the pages and content of a site before creation even begins. They let you categorize your web pages based on which pages have the highest priority. This way, search engines can understand the pages to prioritize on the SERPs, and designers can understand which pages matter the most.
You can think of sitemaps as the structural layout for your website.
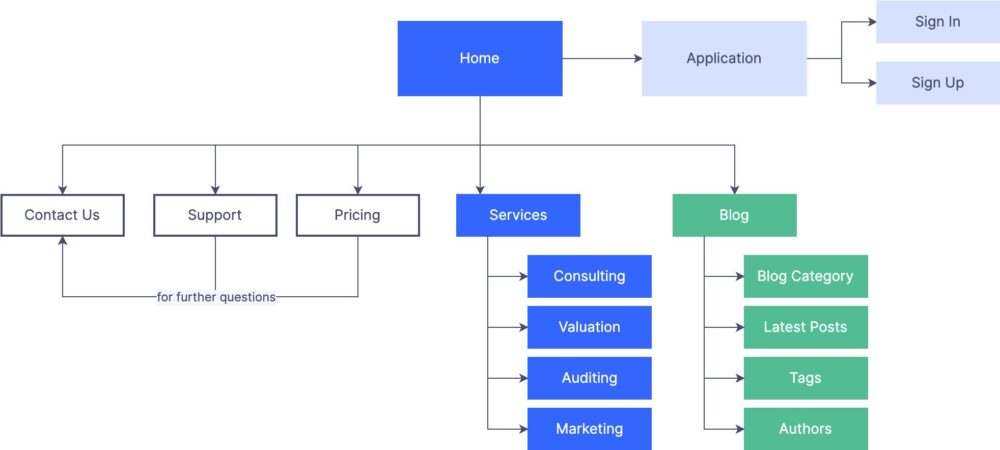
Let me show you a simple sitemap example from the Zen flowchart. The site has plenty of ready-made sitemap templates. And they’re all free to use.

How do you create a visual website sitemap?
Traditionally, people drew sitemaps with some old-school diagramming tools. Today, nobody has the time for that. Not when there are free tools like Zen flowchart with plenty of free sitemap templates. With Zen flowchart, you don’t need to learn how to make a flowchart sitemap. Just pick a template and follow the steps below.
1. Step 1: Pick a Sitemap Template on the Zen Flowchart website
There are many sitemap templates on the Zen flowchart website. You can check them out for yourself.
Another reason it makes sense to choose one of Zen’s templates is the fact that the templates come with collaborative features. So, whatever you do on your end can be viewed, edited, or commented on by other team members anywhere in the world.
2. Step 2: Make a list of all the sections you think deserve to be primary sections on your website
The best way to do this is to imagine the site in your head as though it’s running. This way, you can easily picture all the major sections. Once you have those, you can jot them in a notepad somewhere.
Common examples of web pages that would pass as primary sections on any website are:
- Blog Page
- Sign Up page
- Login page
- Product or service page
- Case Studies
3. Step 3: Make a list of all the pages you think deserve to be secondary pages on your website
After your primary pages, the next in line are the secondary pages – the subsets of the main sections.
Generally speaking, any section you think cannot stand on its own (have a category of its own) is the perfect definition of a secondary page.
Again, imagine your future site running in your mind, and then list out those aspects you believe will pass for secondary pages.
So, if a product page is considered a primary page, the pricing tiers for the products on that page will fall under the secondary page categorization.
4. Step 4: Categorize your pages appropriately in the template
Now go back to the template you selected on Zen Flowchart and start planting the pages in the boxes provided.
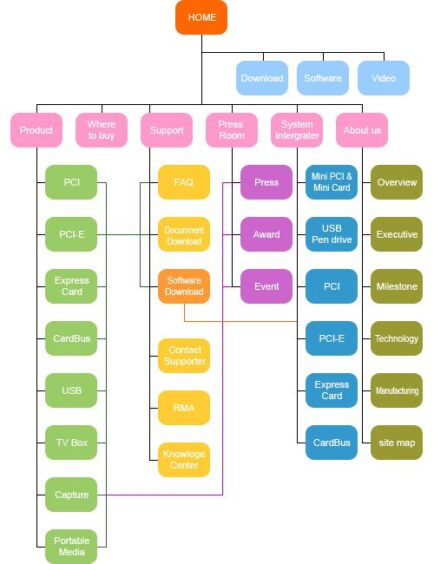
Logically, you want to keep the secondary pages directly on their corresponding primary pages. A clear illustration of this is shown below:

5. Step 5: Share access with the rest of your team
If you’re the site owner, you want to share the sitemap with the designer to be sure they understand what you want. If you’re the designer, it’s important to share the sitemap with the client to be sure you’ve categorized every section as they would have wanted it.
6. Step 6: Trim your sitemap
Per the feedback you get, you should have a clear direction on which part of the primary or secondary pages needs trimming.
7. Step 7: Review all areas
Once you are done, share the final piece with every stakeholder to be sure you’re all on the same page.
Finally, it’s important to note that you want to avoid clutter or jam-packed pages when creating a sitemap. Otherwise, the whole stuff will look messy, and the purpose of your sitemap will be defeated. You should take a close look at every sub-category to be sure pages are placed under the right categories.
Why should you create a sitemap: What are the benefits?
1. Content modification
When you use the regular XML or HTML sitemap on your site, Google will be notified when you make a modification on your site. This is good for SEO. It allows search engines to reward you with the proper ranking your current content deserves.
2. Helps with UX
User experience is an important part of website building. It’s everything that relates to the experience visitors get when they come to a site.
Sitemapping helps to create awesome UX. You can think of sitemaps as the navigation footprint designers need to create awesome UX.
3. Content categorization
Sitemaps let you give priority to various sections of your site. It places the most important pages as the main sections and the least important ones as the sub-sections.
4. Make sense of your overall site structure
When designing a site from scratch, you may not know the exact amount of pages and subpages you’ll need. With a sitemap, you can easily see your site’s hierarchy and then spot which pages/subpages are important and which are not.
5. A clear pathway for designers
When building a site, you don’t want your designers forgetting anything or leaving out any page. Unfortunately, for large sites or overly-complicated ones, this can happen.
To prevent that, you can use a sitemap to guide your designers. The tool will act as a roadmap showing them the number of pages and subpages they need to work on.
Want more news from the Tech world for Gaming Peripherals to Hardware Click Here


You must be logged in to post a comment.